III - Câmara Serena
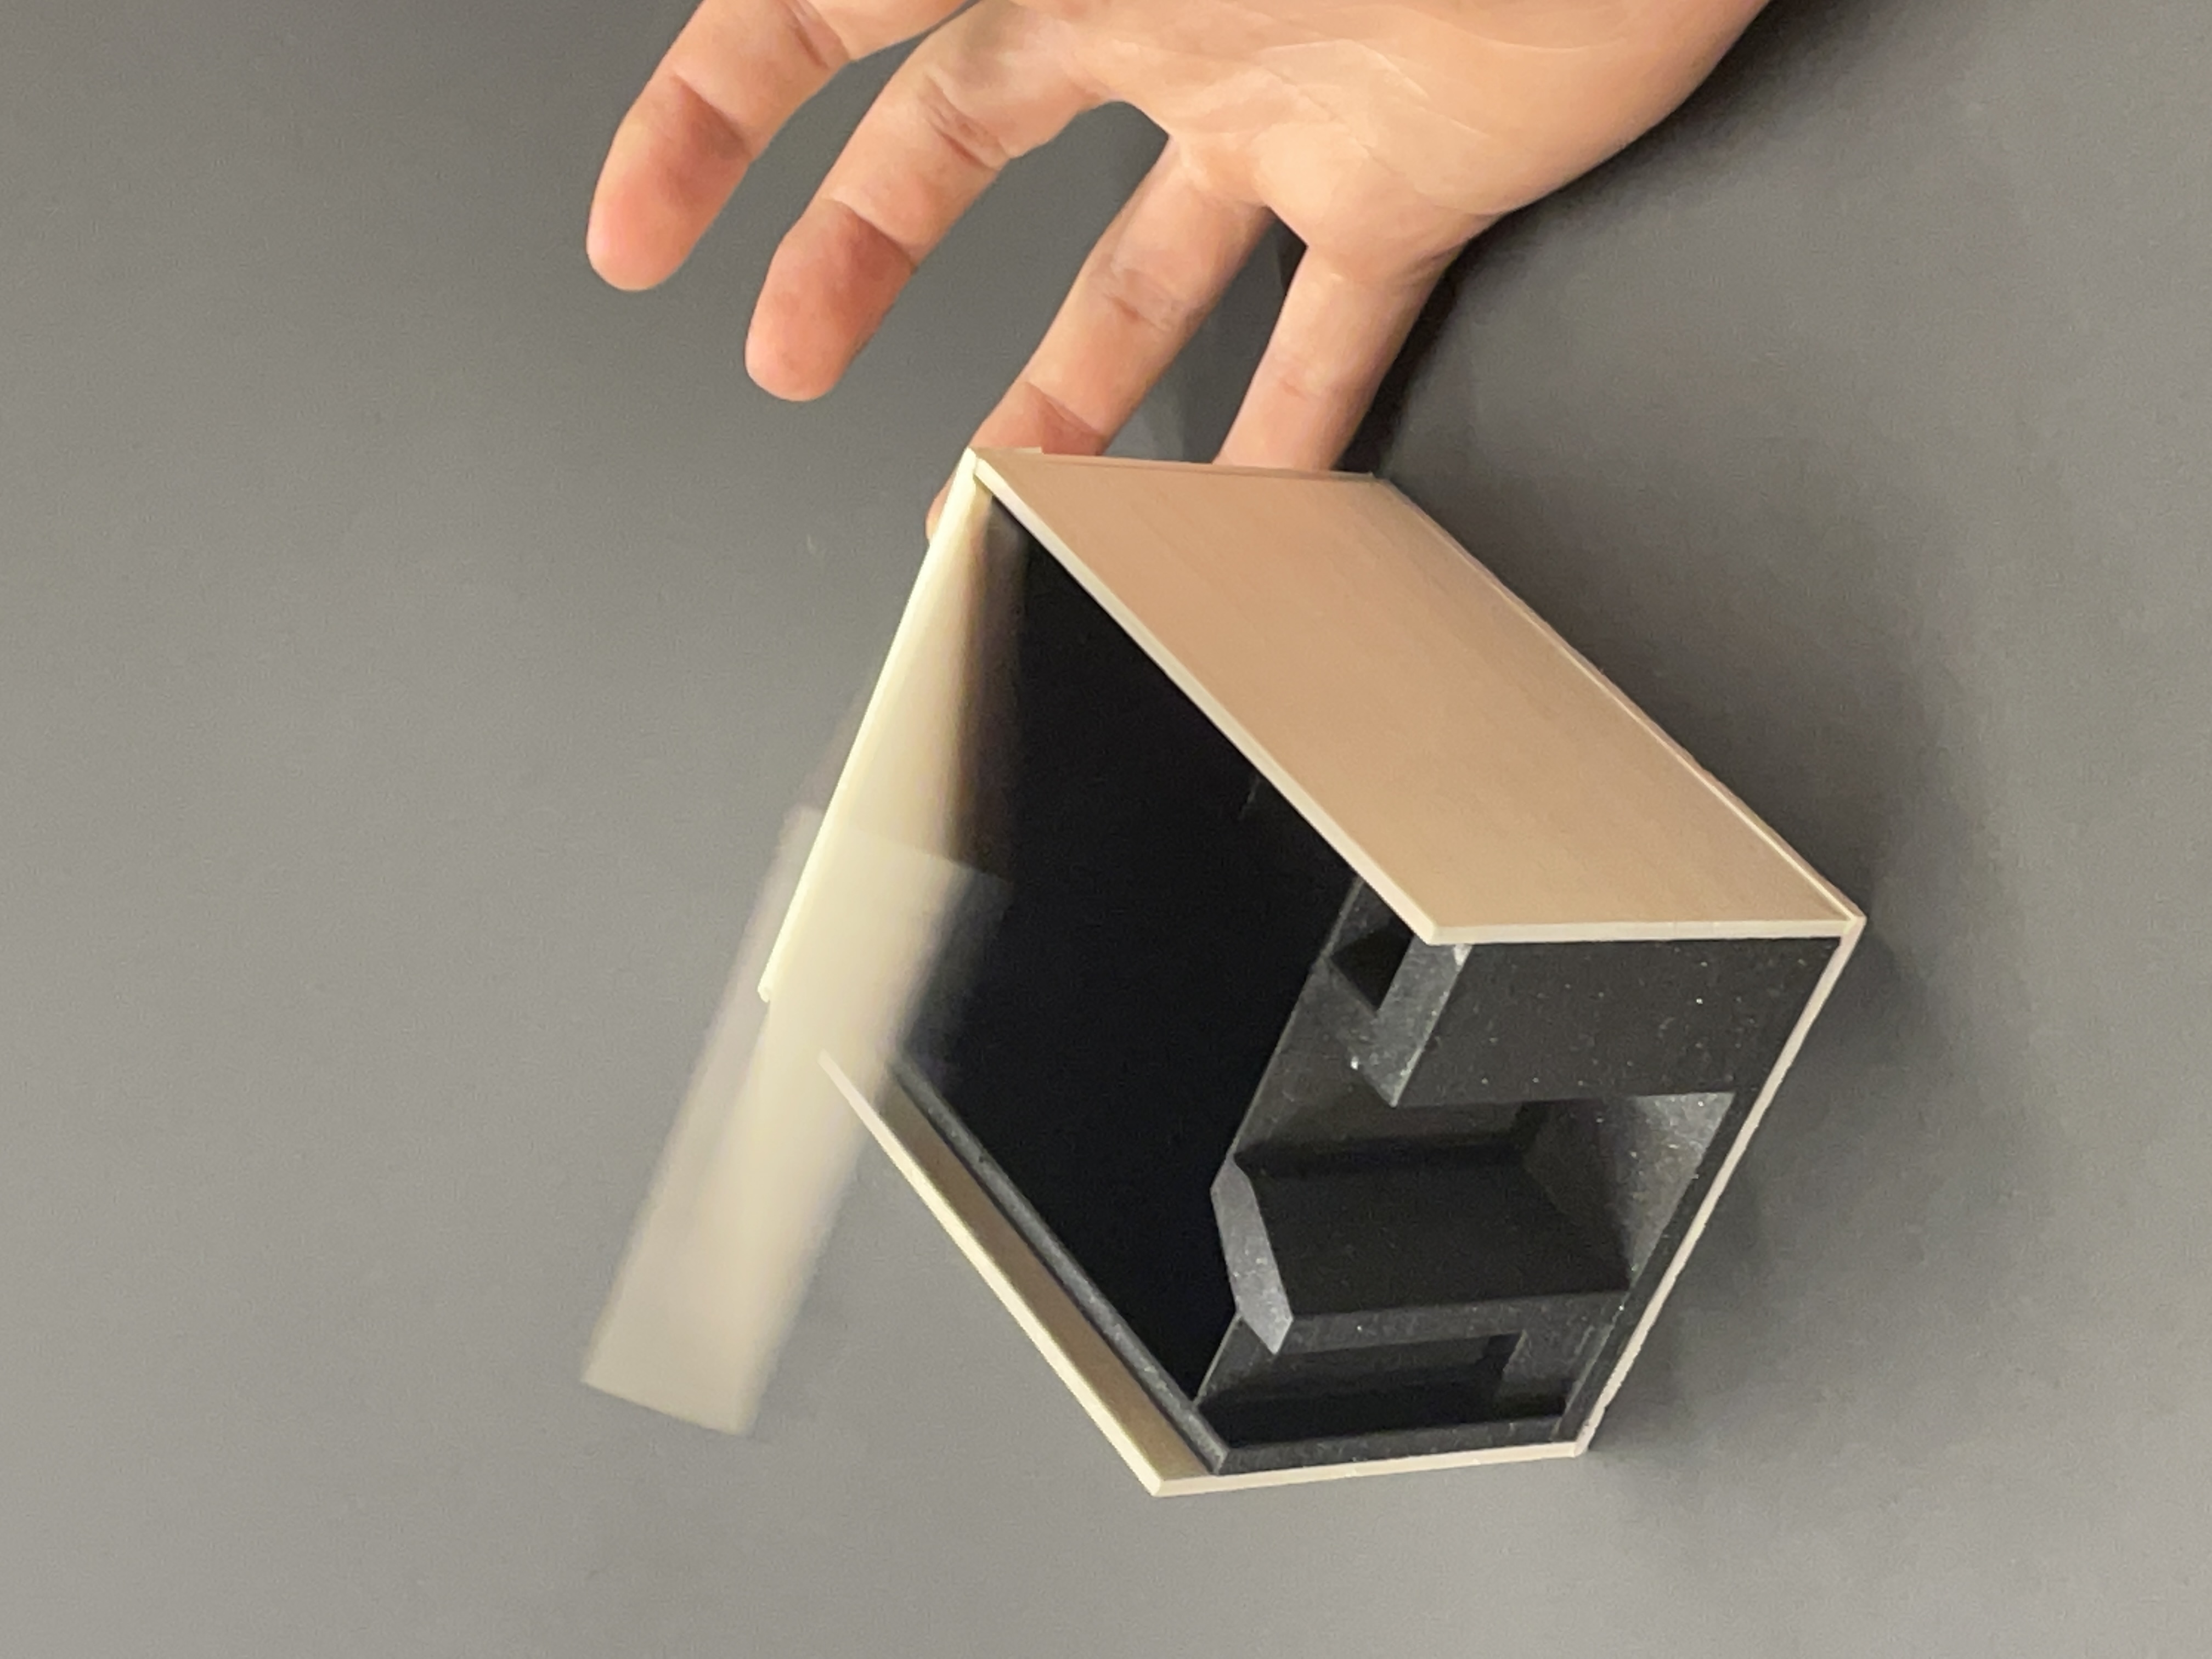
A maquette that photographs with space
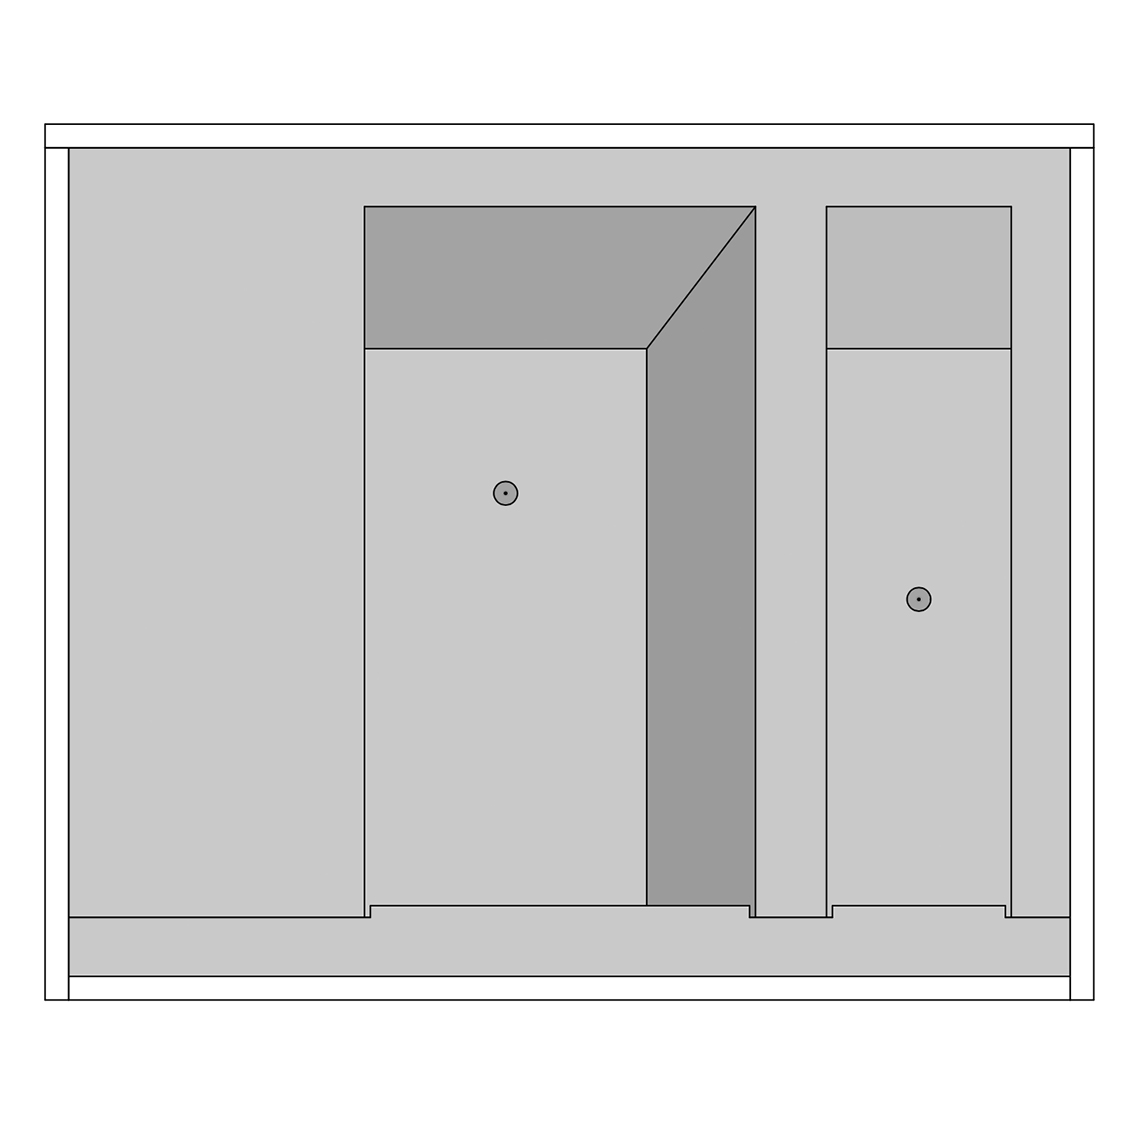
In creating this object we tried to achieve a synthesis of the space to be represented. It didn't make sense to add extra elements that are in the space of these standard rooms (e.g. the desk, the stall, the doors, etc.) In order for it to function as a photographic capture tool using the pinhole method, it would need to be a simplified enough version not to hinder the realisation process, while still maintaining the configuration of the basic dimensions and proportions of these space(s).
Conception

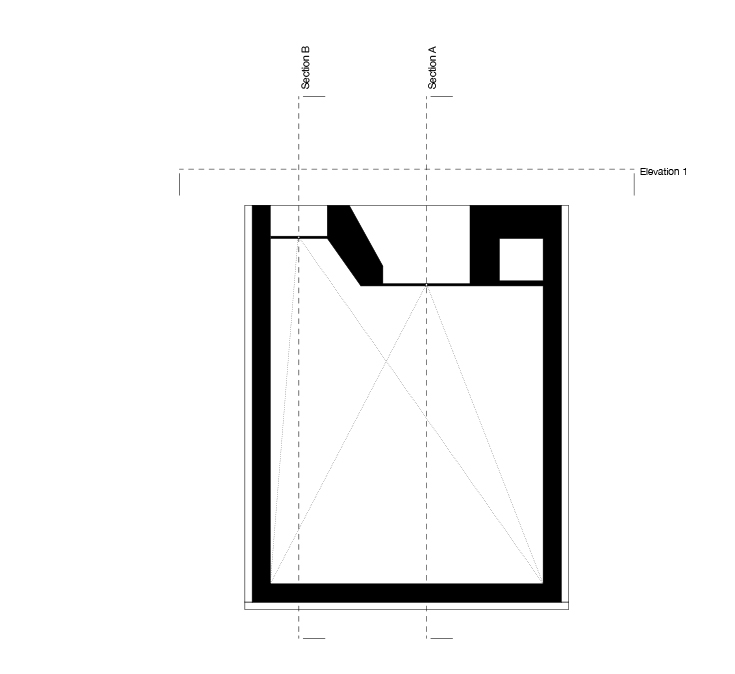

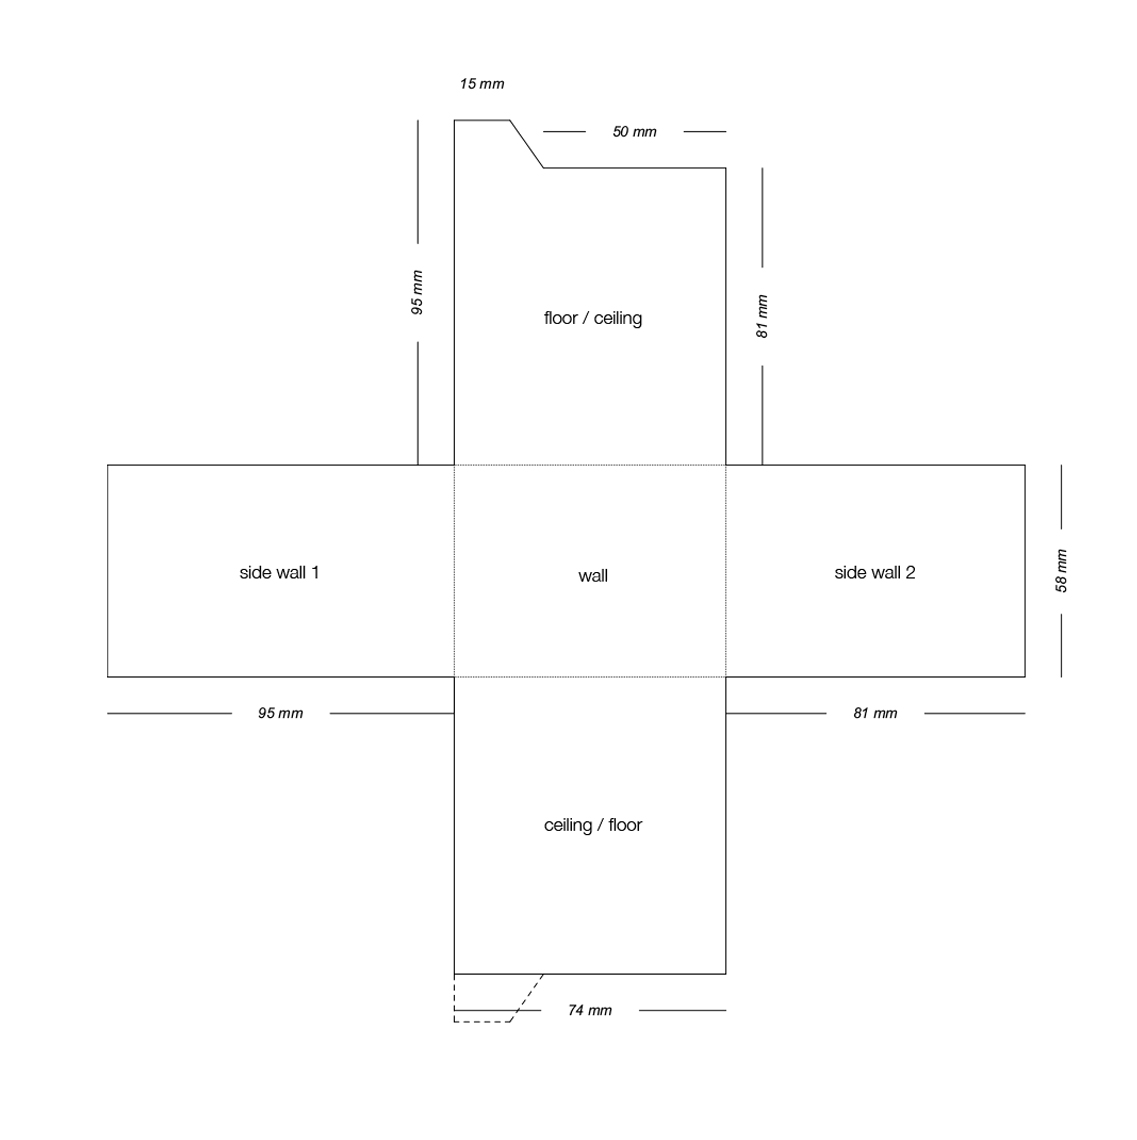
The cut-out of the rebated photosensitive papers followed the measurements of a mould that was guided both by the measurements of the rebating of the Câmara's internal surfaces and the limitations imposed by the dimensions of the original photosensitive paper, two circumstances that coincided by a 2mm margin. The cutting of 42 copies naturally had to be carried out inside the darkroom and stored in Box I.
![]()

Concretization
1. Enter the room and prepare the notebook with data about the room:
- Date / time;
- Solar orientation;
- Weather conditions;
- Duration of exposure;
- Room type 1 or 2;
- Window A, B or both;
2. Prepare the necessary safety conditions to access the dark bag.
2.1. Remove a virgin photosensitive paper from Box I (unexposed papers), reseal it and make sure that the other papers are properly wrapped in the black plastic.
2.2. Insert the paper into the chamber, checking that the holes are completely sealed by the black tape. If the paper is correctly positioned inside, the lid will close smoothly, finalising the load.

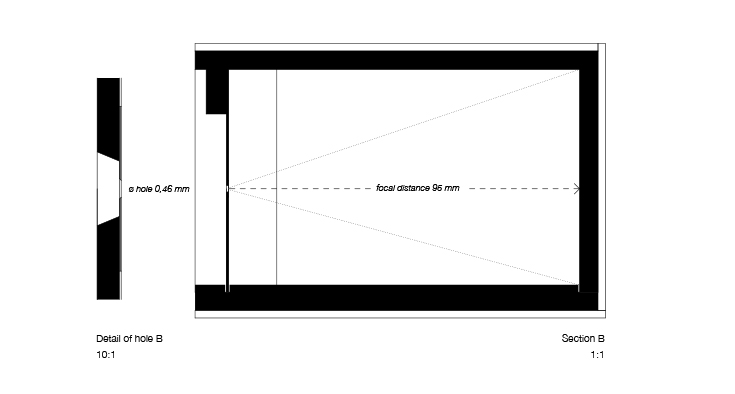
3. Place the model in Window A in a position relative to Hole A (1.75 metres high, equivalent to standing), and peel off the black tape.
3.1. Based on the lighting conditions influenced by the aspects noted previously (time, orientation, weather, etc.), estimate the appropriate duration for exposing the negative.
3.2. Re-cover the hole after exposure.
4. Place the model in Window B in a position relative to Hole B (1.25 metres high, equivalent to seatting), and peel off the black tape.
4.1. Based on the lighting conditions influenced by the aspects noted previously (time, orientation, weather, etc.), estimate the appropriate duration for exposing the negative.
4.2. Re-cover the hole after exposure.

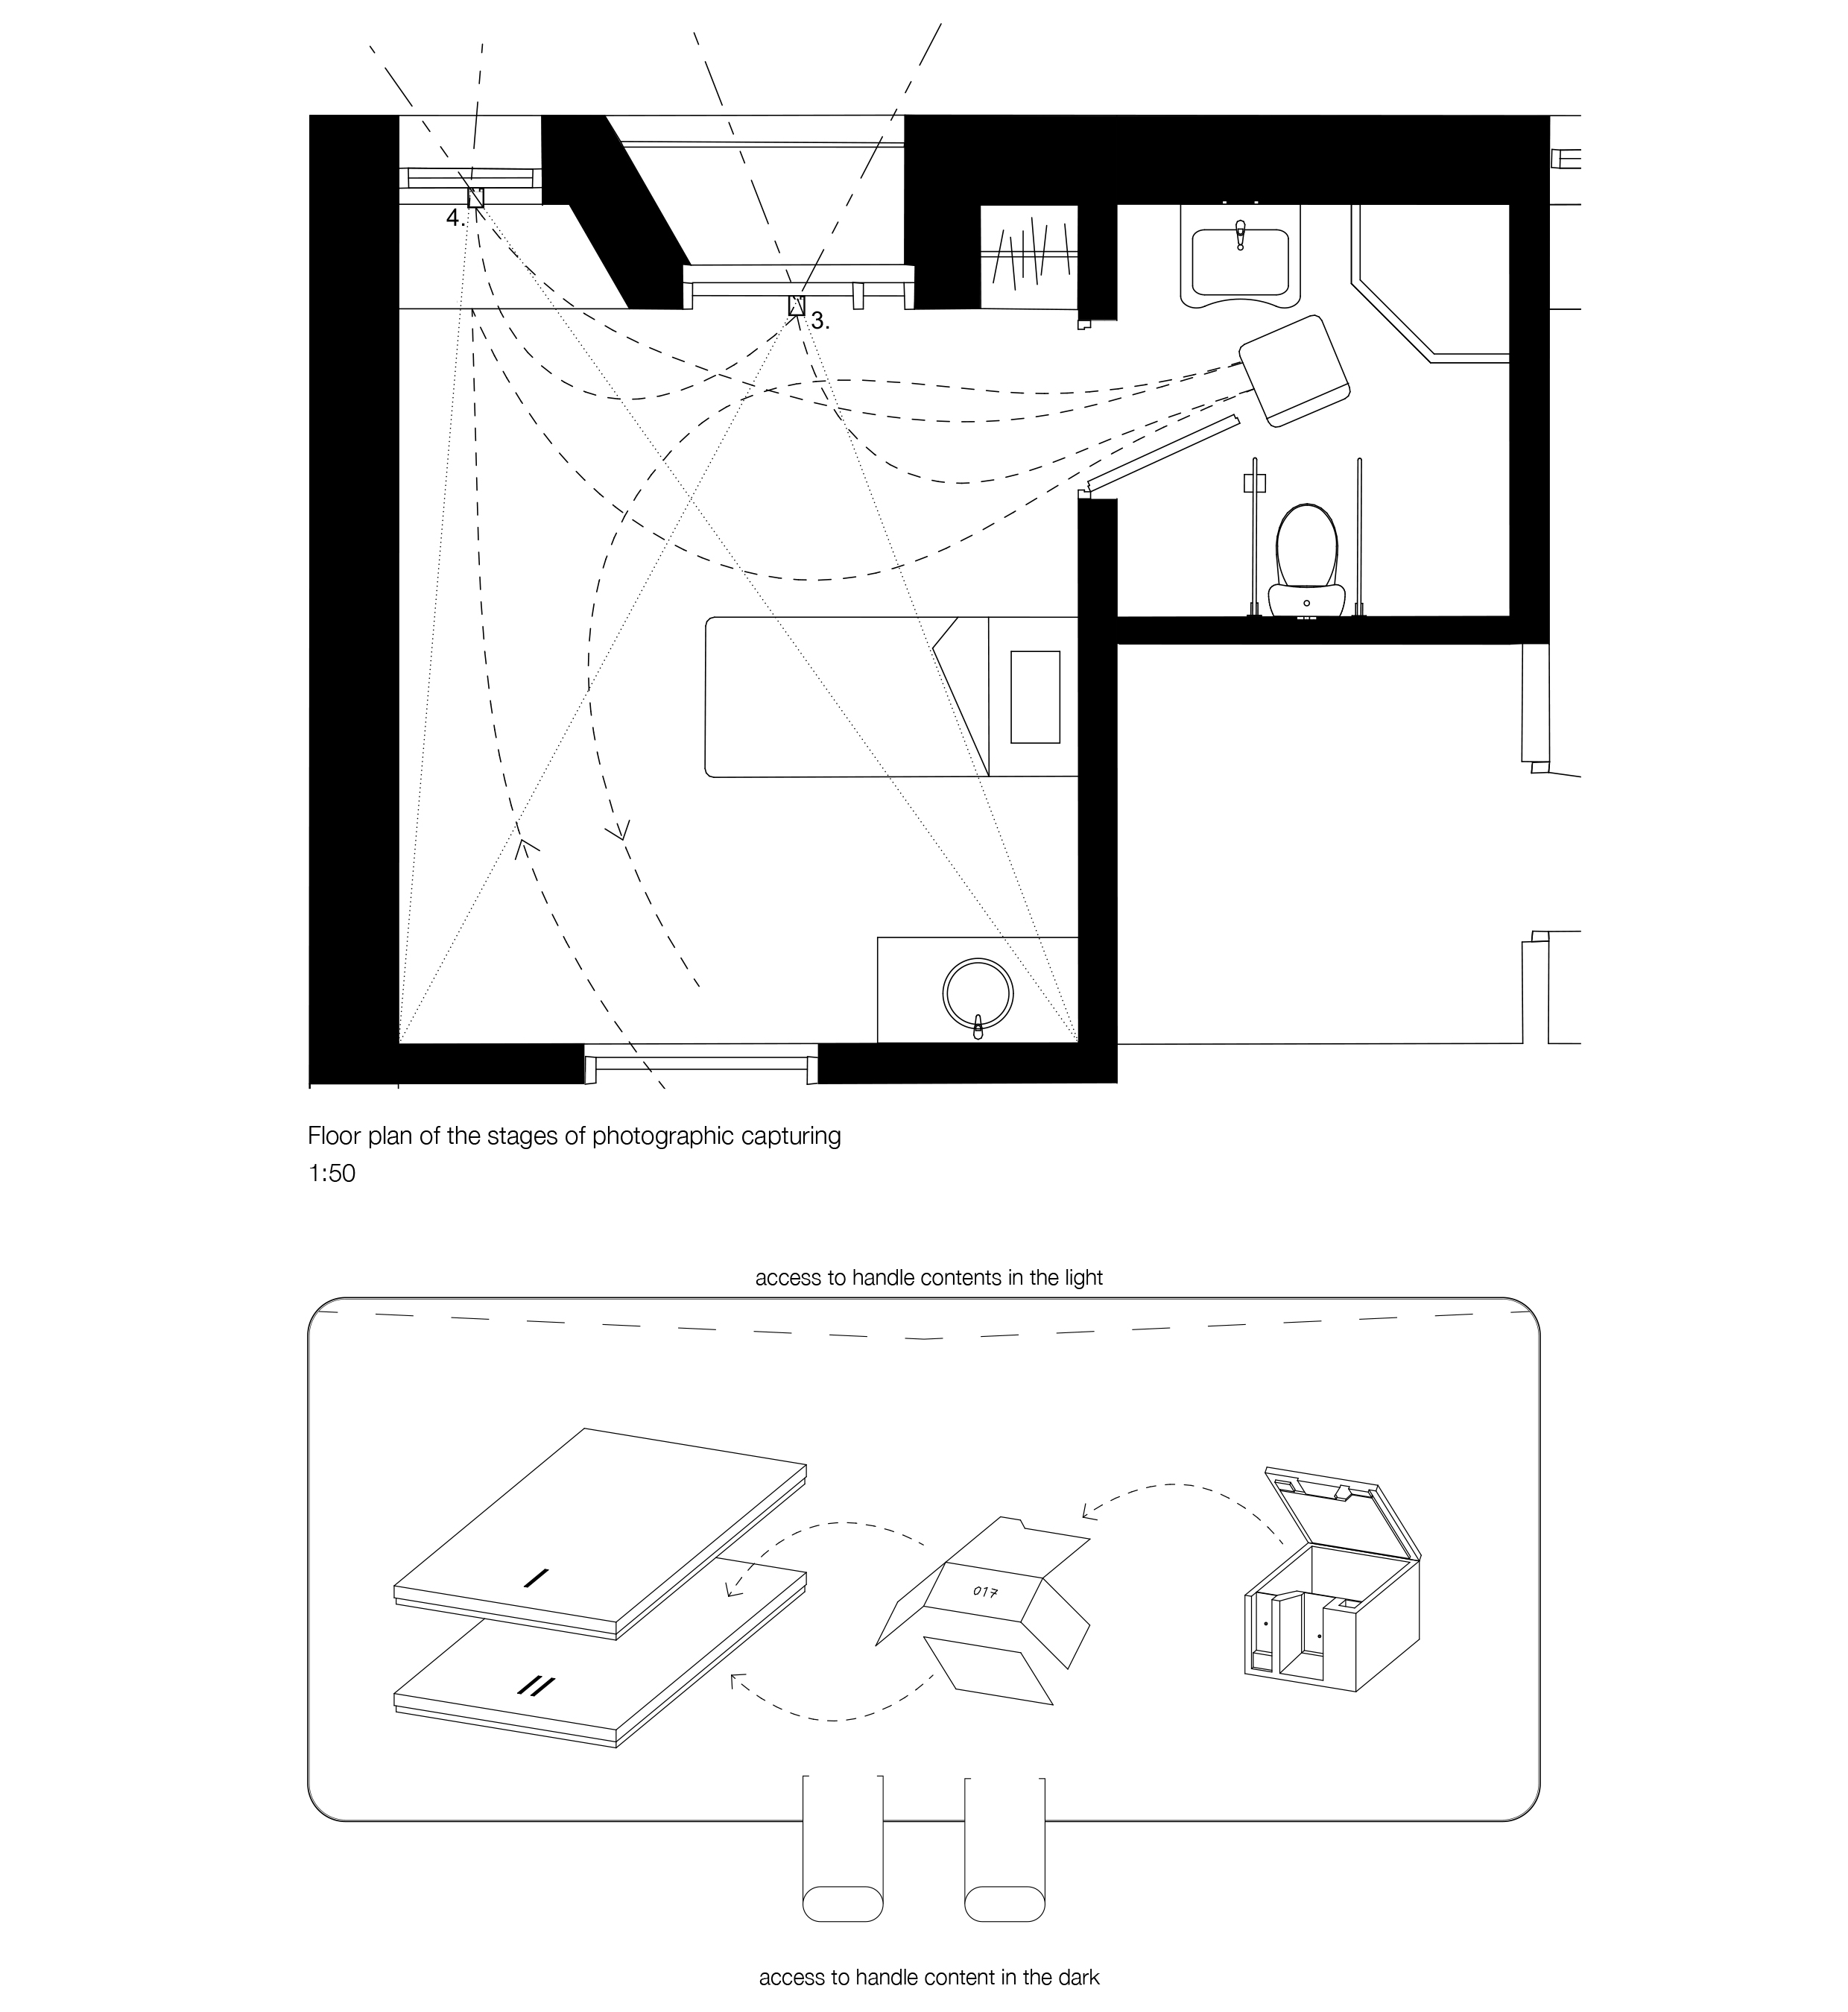
5. Write down the timings of each exposure, as well as possible notes from a pre-assessment of the process.
6. Reinsert the Câmara into the dark bag, accessing it through the openings in the dark-bag.
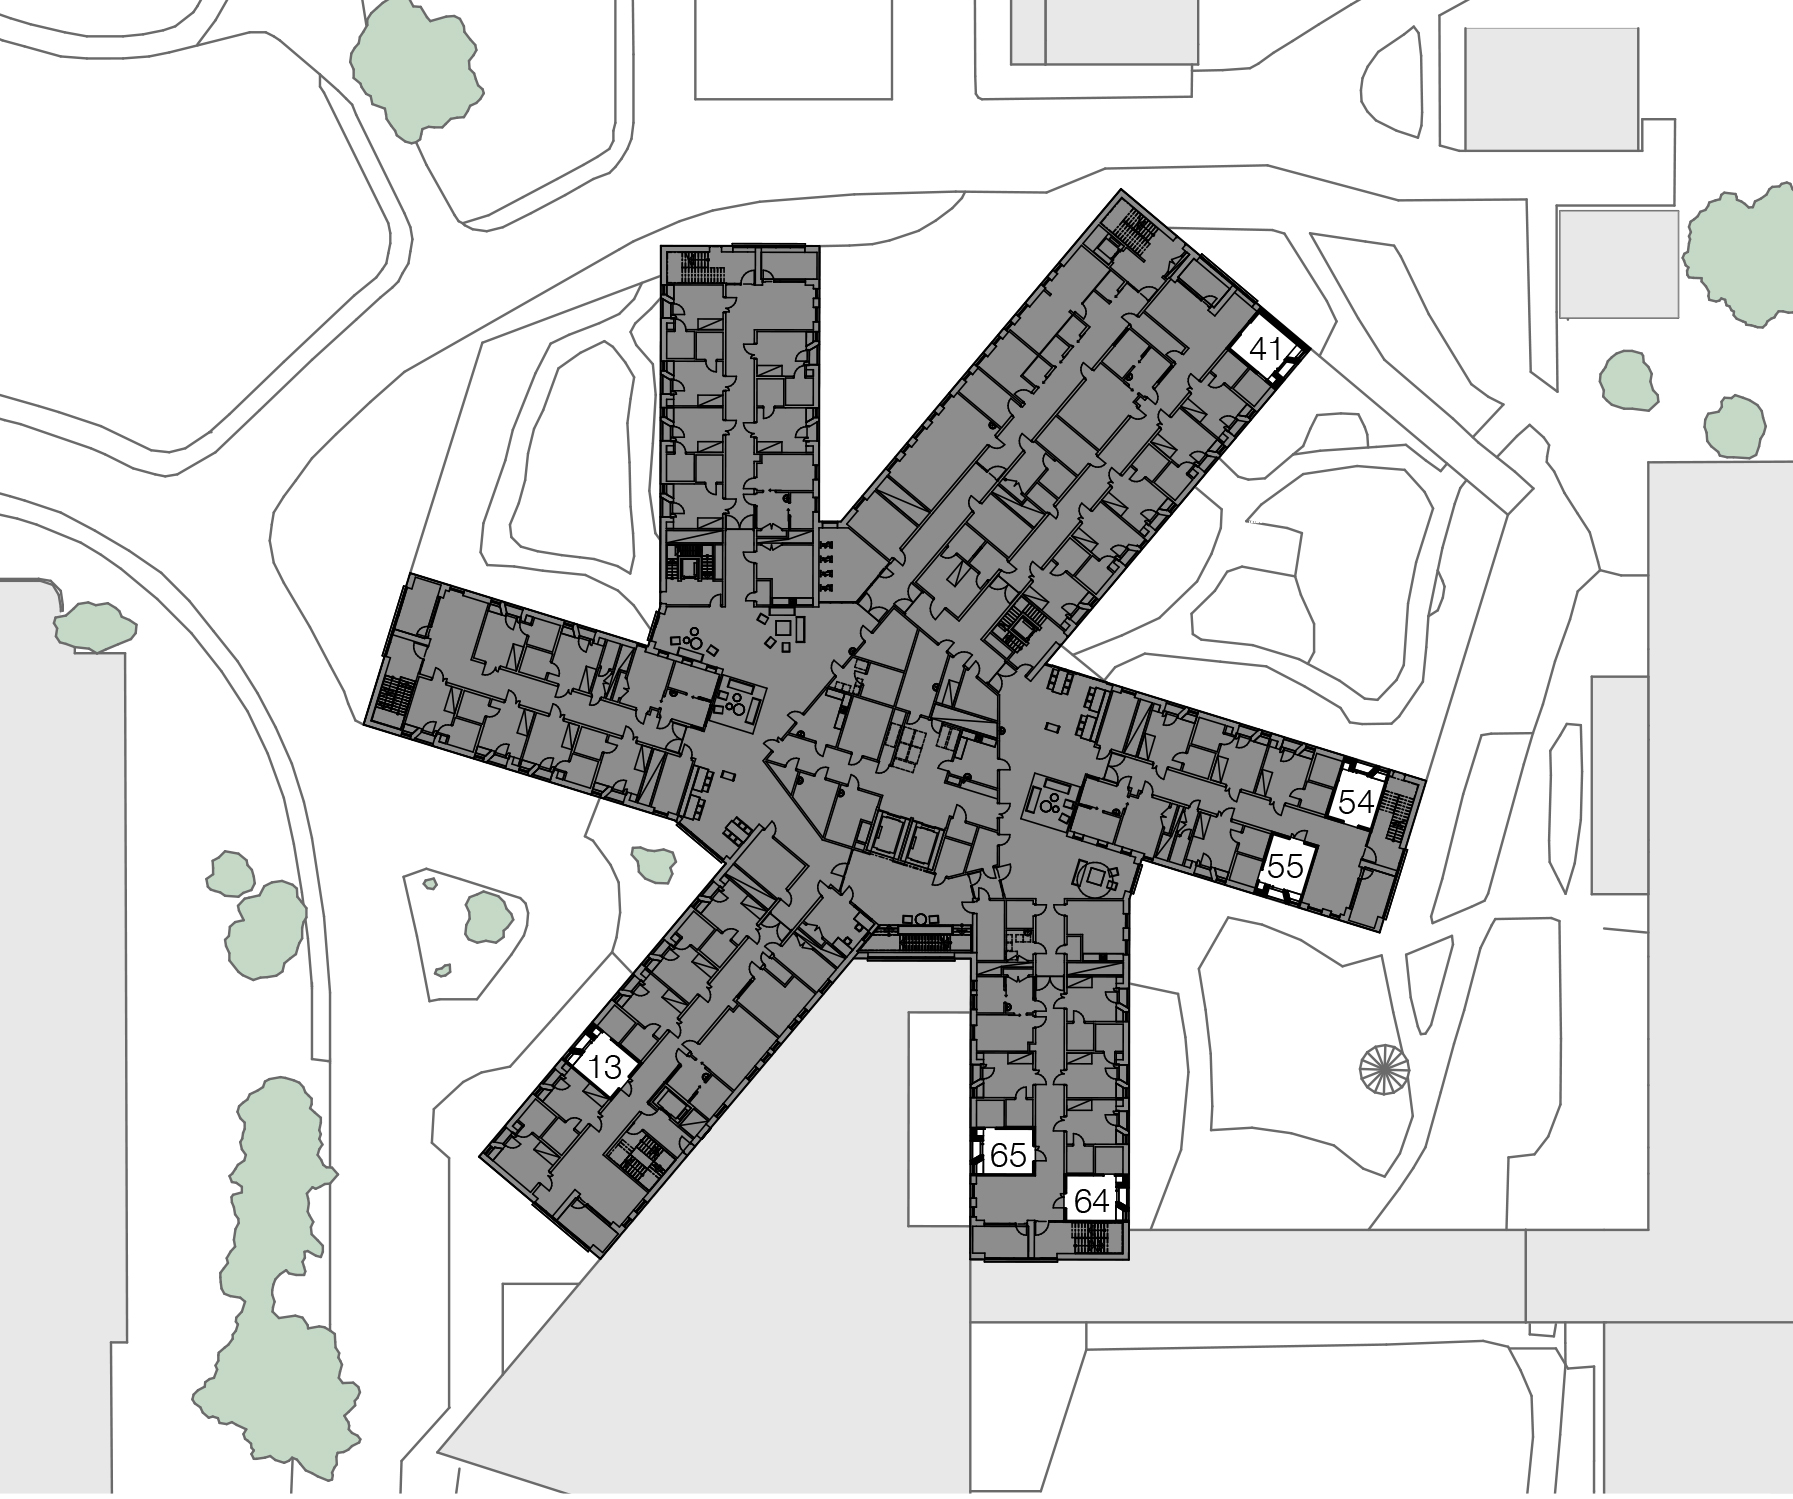
6.1. Check that the paper has been properly positioned during the process, especially in Rooms 54 and 64 where the surface corresponding to the ceiling concerns the loose portion of the trim cut. Repeat the process if this piece of paper has become detached.
6.2. Once everything has gone well, and still inside the bag, write the number of the attempt in pencil on the back of the paper. To avoid errors in reading orientation, start the numbering with a zero (e.g. 06 and 09 instead of 6 and 9).
6.3. Keep the paper in Box II (exposed papers) and move on to the next step.